How to sync your Zotero files with Nextcloud
Recently, I've been wanting to read more AI safety related papers because I kinda want to get the habit of it. I attend this paper reading club where we read a new paper related to AI safety every week. To come prepared, I usually just download the PDFs make some notes in Obsidian, Notability or Samsung Notes. However, this setup eventually became a trap for me because I have this tendency to obsess over processes and tools. If you only know the amount of plugins, videos, tutorials and whatnot for me to finally settle into Zotero and Nextcloud it would maybe worth around 5 blog posts by now.
I settled for Zotero because it's free to use and also open-source. For your information, I am by no means a researcher. I haven't touched Zotero since I was in high school for my final project. College passed me by without me needing a research manager at all. So my use case is just this: load a paper, read the paper, and annotate the paper across my laptop, tablet and phone. I use my laptop and tablet to annotate and I use my phone if I come across an interesting paper while scrolling through LinkedIn, Slack or a forum.
As for Nextcloud, it is also free and open-source to use. I've been self-hosting apps for over a year now. I use Coolify to manage those apps and try out new open-source apps every now and then. I've never really found a use case for Nextcloud just because my files are being managed in Google Drive or One Drive. However, in this case I came across the fact that it actually supports WebDAV. I didn't get into knowing what WebDAV is but from my current understanding I'm able to transfer and sync my files using this protocol. A lot of forums and tutorials regarding using WebDAV in Zotero doesn't seem to mention Nextcloud that much. Eventually, I found the idea in one of Nextcloud's community forum.
For this guide, I utilized the following resources:
- Zotero
- Nextcloud - deployed in a VPS via Coolify
Setting up Nextcloud
This guide assumes you have Coolify installed in your self-hosted VPS. For VPS recommendations, based on my experience, you can use Amazon Web Service (with free credits if you're starting out) and launch an EC2 instance with basic linux configurations. However, I stick to using to Dartnode or Vebble since they were quite affordable annually when I got them.
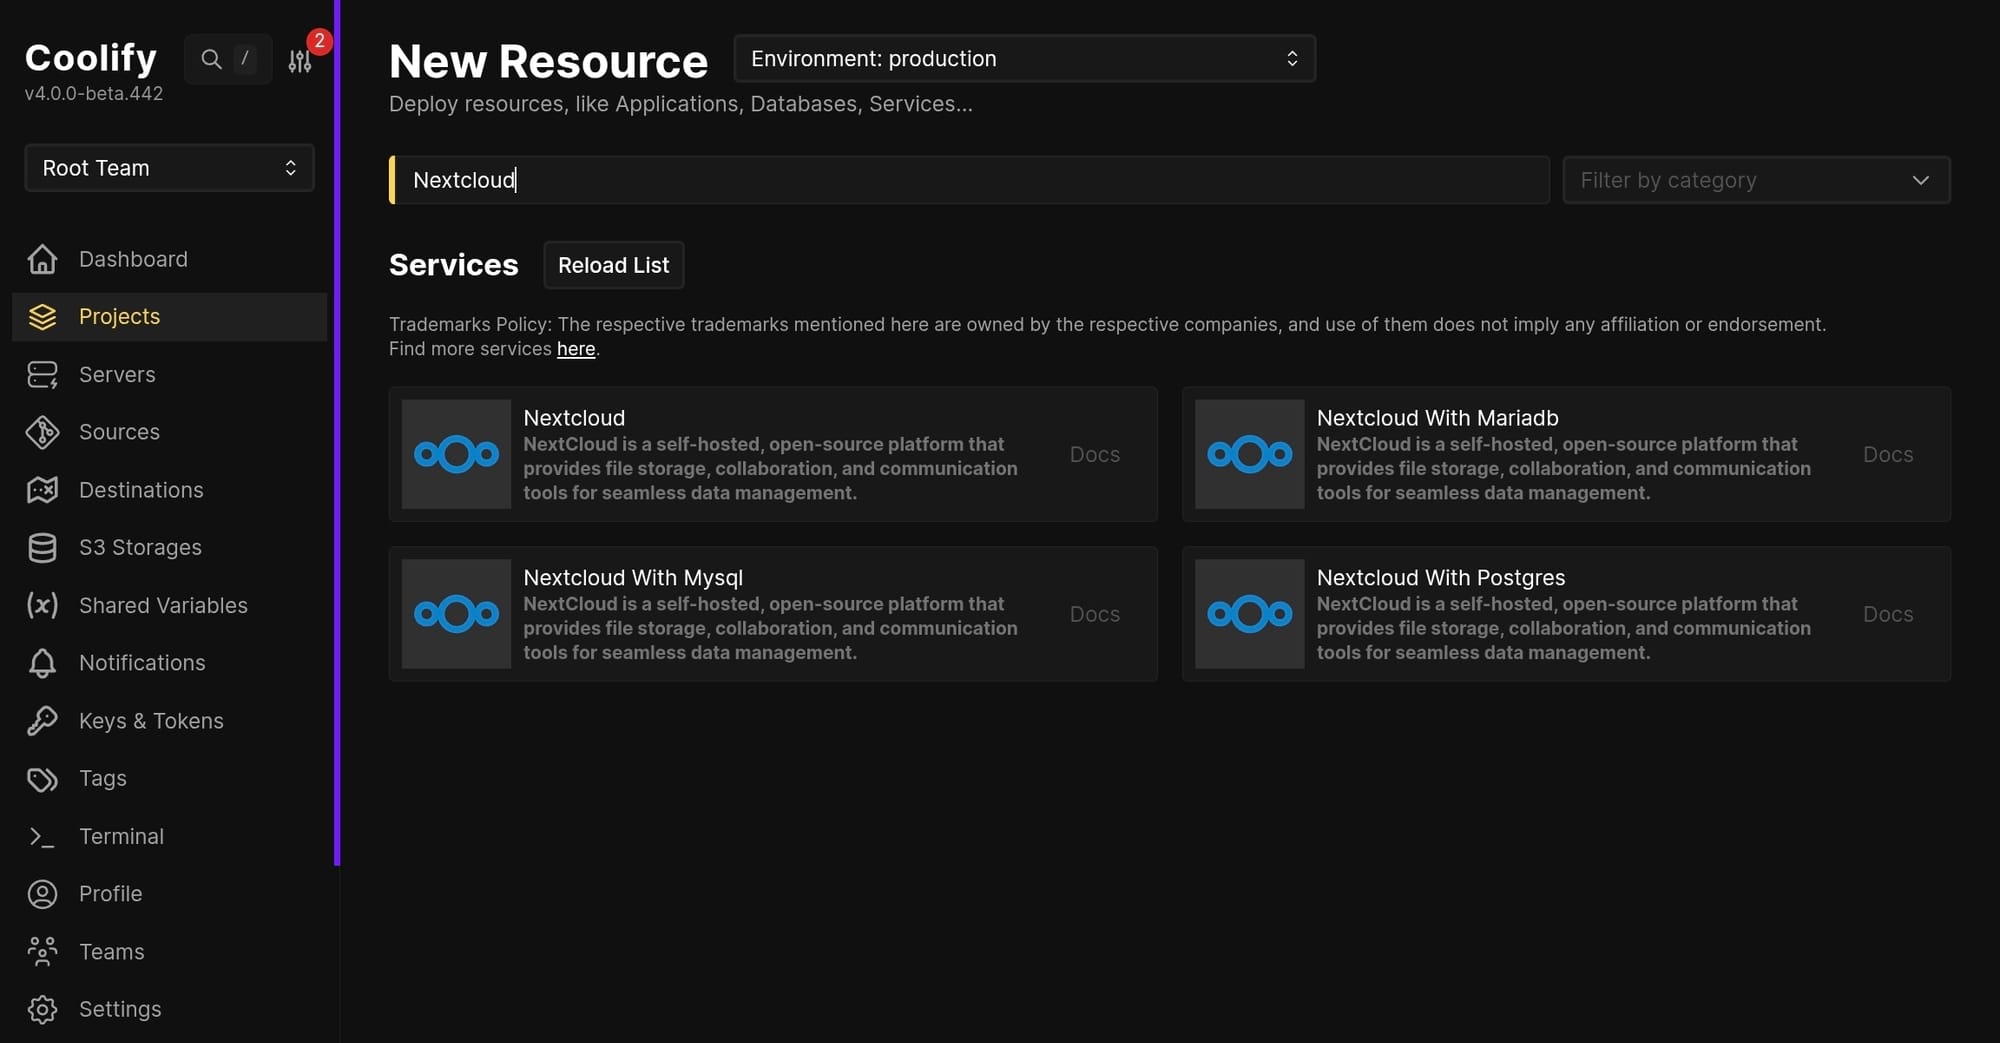
- Create a new resource in Nextcloud. For me, I used the variation with MariaDB.
- After the container has started, you can go to the URL of the instance located at Links.
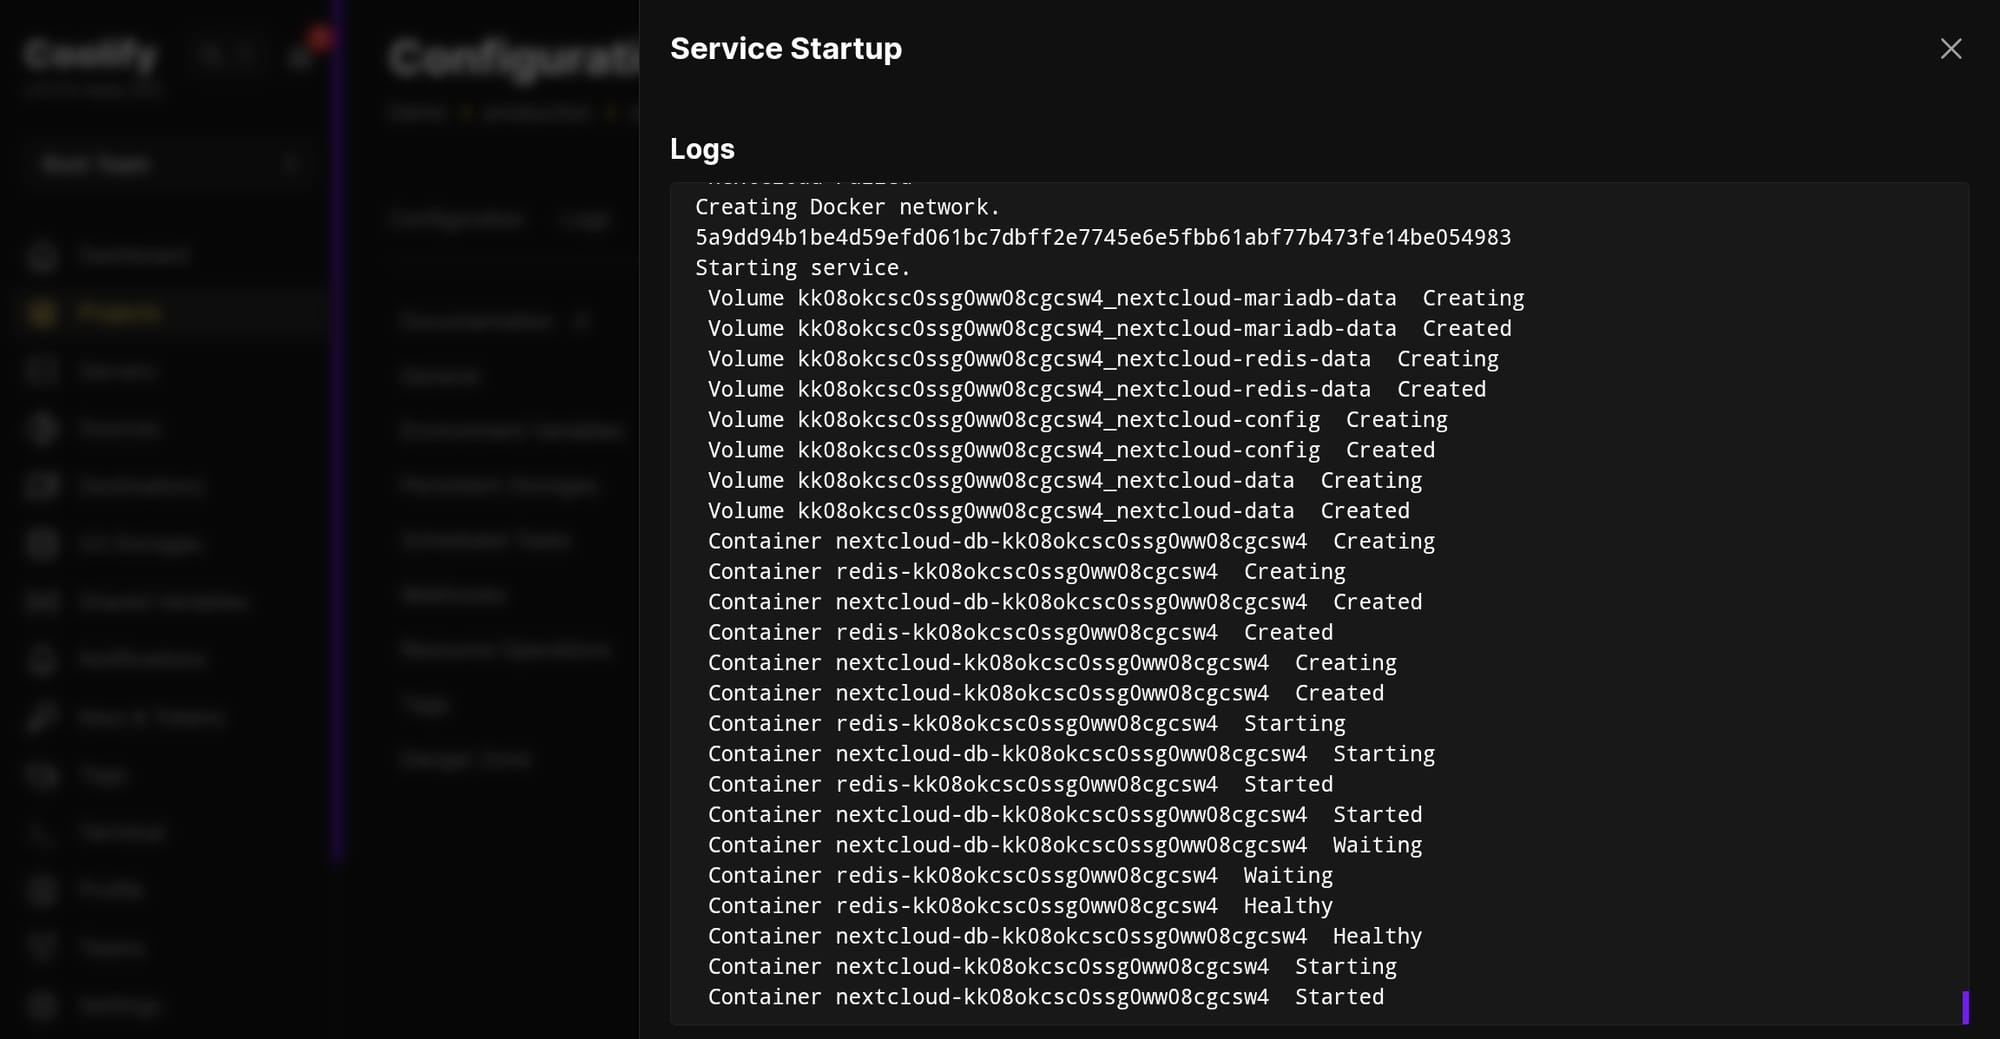
Troubleshooting tips: You can view the logs of each container deployed in Coolify or use the terminal to check for statuses.
- Going into the link, you're going to be welcomed with the setup page for Nextcloud. Set an account name and password, let the Data folder field as is, then for the Database configuration, click whichever is most appropriate to your instance. In my case, I used MariaDB.
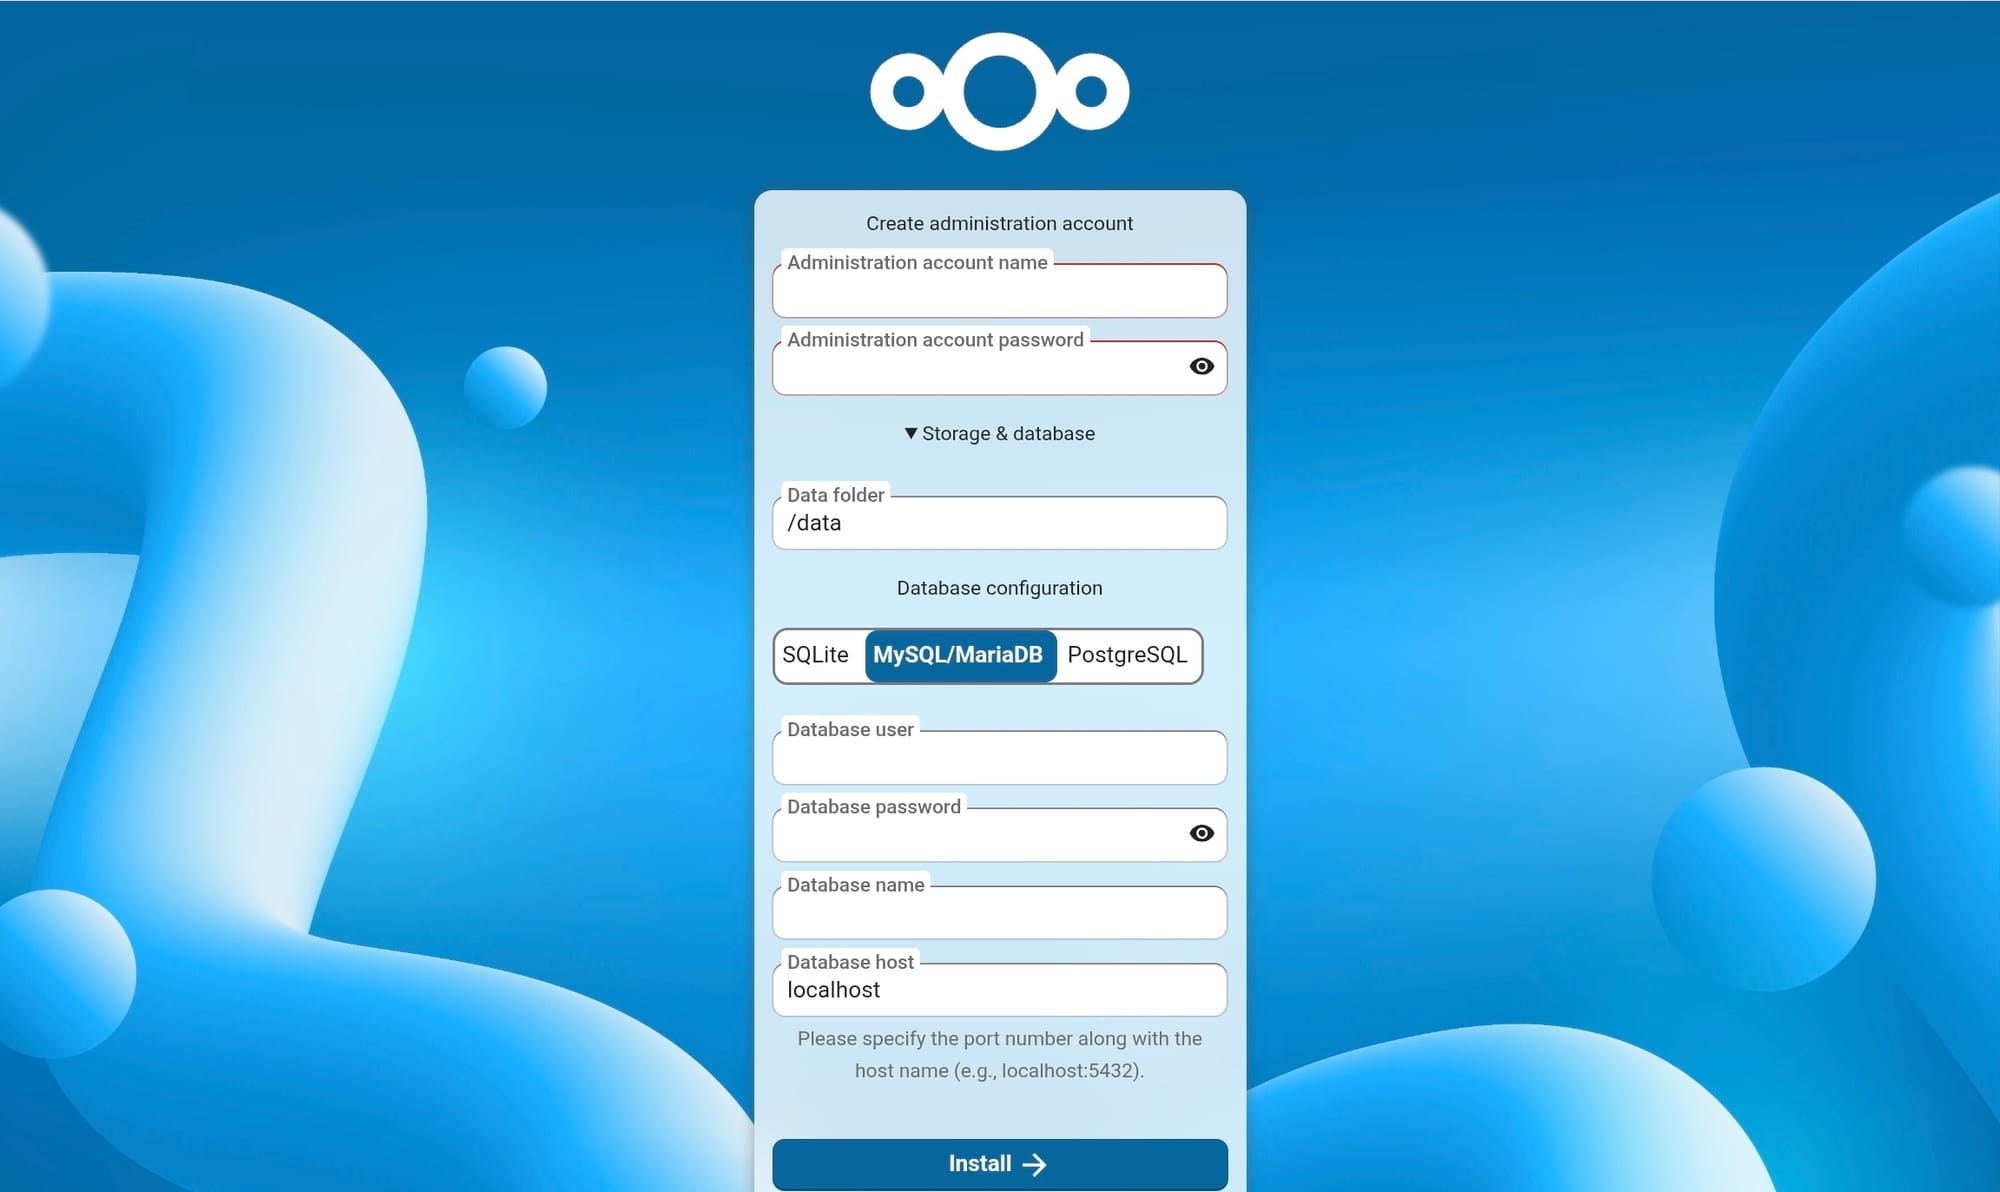
The database user, password, name are found in the environment variables in Coolify.
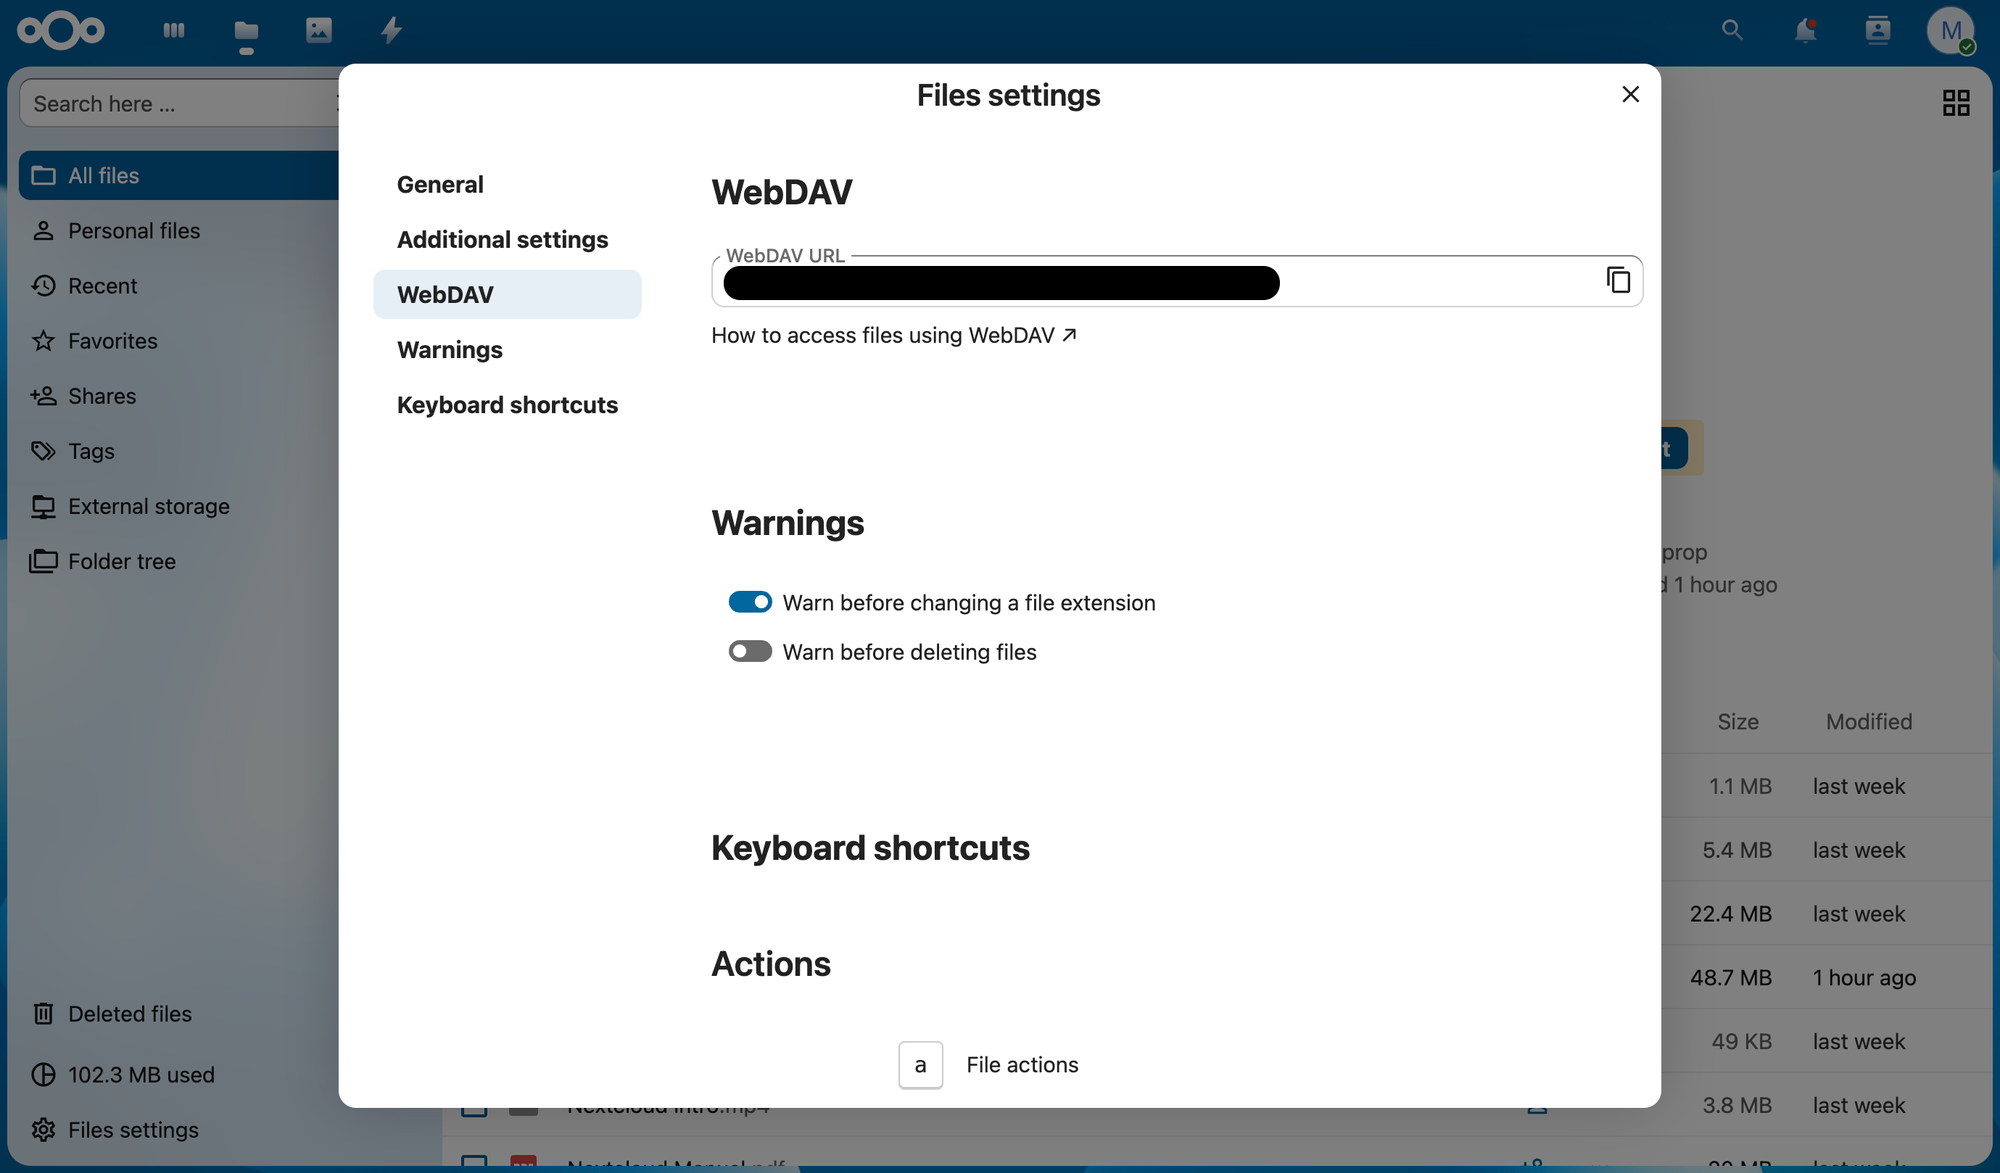
- In Zotero, you need a WebDAV URL where you're files will be syncing. To get the WebDAV URL in Nextcloud, you would need to go to click the files icon then go to files settings. This will show a pop-up that has WebDAV as a tab. Here you can get the URL that you will be inputting in Zotero.
- Given your WebDAV URL, you can now enable file syncing using WebDAV at the Zotero settings then go to the Sync tab. Place the username and password of your Nextcloud account and click verify.
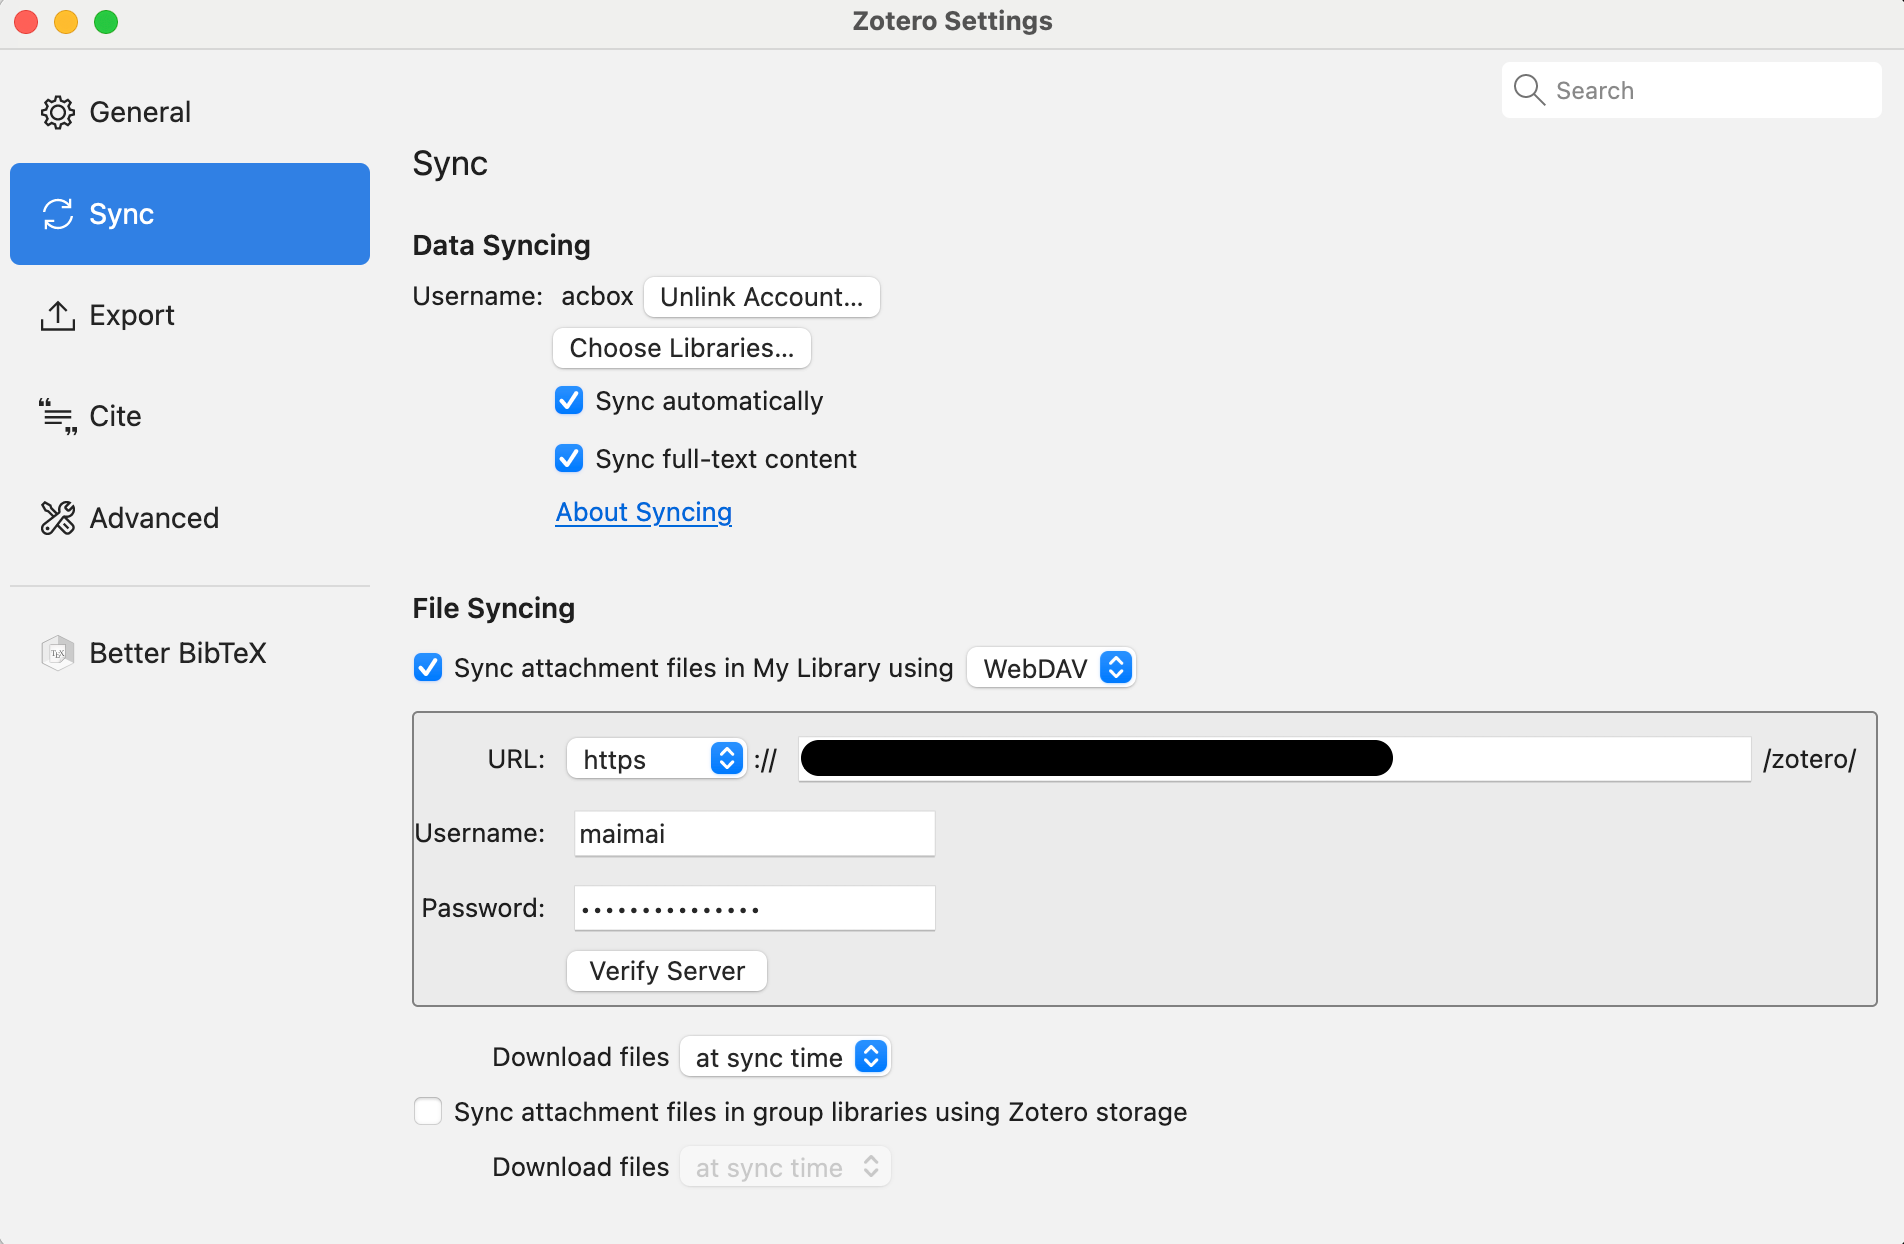
- You're done! You can check your Nextcloud Zotero folder to view the synced files. Each device you use Zotero with requires you to set up the file syncing with WebDAV. This allows you more freedom with storage beyond the 300mb allocated by Zotero.
Hopefully you find this guide helpful. If you have any questions or concerns feel free to contact me directly!